Showing posts with label WIP. Show all posts

Monday, 21 April 2014

Warhound Titan - part 2

This is the second part of my journey through painting up the Warhound Titan.


This installment sees me complete the two co-pilots and paint the part of the engine that is visable through the grill on the top of the main part of the body.

The pilots I kept quite dark in colour so as not to distract from the colour of the cockpit.


The Engine housing is barely visable through the grill, so absolute painting skills are not required. Rather I wanted to give an impression of an operating machine.


Saturday, 19 April 2014

Warhound Titan: The jouney begins


I am an active member of a local wargame club. Occasionaly, club members are kind enough to stroke my ego by asking me to paqint figures for them. To make life easier for myself I made a few rule. I have said I will paint one figure per person.

I never placed a limit on the figures. I am starting to think that I should have done.

A club member has handed me a very large shoe box, which when opened contained a Forgeworld warhound titan.

Oh well let get to it.

I have started with the pilot or the Princeps if you prefer...

Hope you enjoy.


Sunday, 22 July 2012

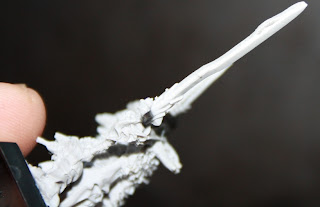
straightening the vampires sword

I have a longstanding arrangement with my friends in the local gaming community. This is that I will agree to paint any figure they want, so long as it is only once per lifetime...


Well, a good friend from my local gaming club decided to take advantage of this offer and passed me a Vlad von Carstein model from GWs Vampire counts range to paint


The only problem with this is that it is a fine cast model and the sword was in pretty bad condition.


The sword was not only bent out of shape but had a pretty strange split near the end. The owner had already assembled it, so I could not swap it at the GW store ( I understand that they will swap with no hassle), so I had to try some repair work....


I have heard that you can reshape finecast by first placing in boiling water, putting into the shape you want and then putting into cold water. I tried this and found that once the sword was put into the hot water it became very floppy and I could put into any shape I wanted. The problem was trying to make a straight sword and holding it straight long enough to put it into the bowl of cold water. Eventually I got it as straight as I thought I could get away with.

I then filled the sword with green stuff, let it dry and filed it flat. Not great, but better than I started with. Next up I will get to throw some paint at it.

Wednesday, 27 June 2012

Terrorgheist base finished.

I have been putting together a base for a Terrorgheist I have converted. I have played with the base Terrorgheist model to put his wings out sideways. This means he heavily overhangs both sides of the base. If he is going to be usable on a tabletop then I will need to raise the model above the tops of other models. This needs me to lift him high up. To achieve this I have added some walls to sit him on top of. The arrangement was put together with just the body part of the beast asseembled to ensure that he would sit right.


I have now added a little paint to the base. I have tried to keep the base colours fairly restricted so that the base will not distract too much from the beast. Having said all that I had a bit of fun shading each of the blocks in the wall to try and make it quite natural looking.

I have tried to keep the metal work as painted black with areas of rust coming through.

Now all I need to do is add a little colour to the terrorgheist!

Hope you enjoy.

Wednesday, 20 June 2012

Spread your wings and fly little Terrorgheist!

Did you know that even with his wings held fairly tight to his body, as above, the Terrorgheist has a wingspan of 14 1/2 inches (almost 37cm). I know this because I have been playing with a Terrorgheist conversion to show off his lovely wings. I believe that with the wings stretched out they could reach a whopping 26 inches (66cm), but even I am not daft enough to try that conversion - just yet!.

I first played with flying beast conversions with an Imperial dragon for Karl Franz. I have recent looked again at this model (following a chat on the excellent Warhammer forum) and felt inspired to have a play with the biggest Vampire counts beast.

The majority of the animal is built as normal, but the wing to shoulder joint had to be repositioned. I put a solid pin in there and set about hiding the joint by building up layers of muscle around the gap.

 I did this in a number of stages for two main reasons.

First I wanted to make sure the muscle  looked OK. With my limited sculpting ability I wanted to pace myself so I didn't get too frustrated with my lack of ability and I wanted to review each step.

Secondly, this starts off as a big model,when you have made it so wide it becomes very awkward to handle. I need the figure to be robust to play with, so I need to make sure I don't snap it in half in one go, so I fixed each wing individually and then let them set before having a go at the second one.

Pictured below is the finished model ready for its undercoat and resting on its back. It was a difficult birth and I guess it needed its rest. I certainly did!


Wednesday, 13 June 2012

Building a base for a Terrorgheist


A Terrorgheist scream is a truly awesome thing and having been on the receiving end of it with my Empire army was all the encouragement I needed to add one to my Vampire Counts army.

I thought that I would start with the base. Now I have two significant problems with the GW base build;
  1. It is just too barren. The base is very large and the small amount of jagged rocks not only look a little lost, but don't look gothic enough for my visual image of a VC setting. After all where are the skulls? I thought the GW approach was at least 20 skulls per square inch of base!
  2. For reasons that will become apparent when I go on to assemble the Terrorgheist, I need more height!
This is the base that evolved, and I will talk through how this came about.... 

The base itself was a bit of a disappointment. It was warped at the corner. I tried setting it again by placing in alternating boiling then cold water, but that did not work. In the end I just learnt to accept it and hope that the weight of the scenery on it would hold it down (it has not).

I then assembled the trunk of the Terrorgheist. I knew I wanted him to stand on the garden of Morr wall, but needed to learn how high the support for the other leg needed to be. So I made a little mock up. I tried different sized pieces of plastic until I got the assembly to look about right. Thank you blue-tac.


The gravestones were put together using scenery pieces from a company called Renedra. They fit great and were very easy to place. I selected one just the right height to support the beasts left leg. The only slight problem with these is that they have quite a few crosses and Christian iconography, which just does not fit into the warhammer world. Never mind, I was able to find sufficient to suit my needs.

I made a path out of flagstones from a spare GW movement tray kit. I did this mainly because I wanted to use a gate, so needed a reason to have a gate. I had to remove then rotate the gate so that the skulls etc were facing forward on the model.

I then added to old spare tree trunk bases from microart studio to break up the space at the front of the base. Next comes the beast itself!

Wednesday, 30 May 2012

Empire: Swordsmen conversion

Nice simple conversion going on here...

I recently managed to get my hands on some 6th edition empire sprues. These are the ones where they combined the spearmen with handgunners on a single sprue. All very nice figures, but not to put too fine a point on it, I have more than enough of both. My current need is for some more swordsmen.

The conversion, is just a straight hand swap.The swordhands come from my stock of empire spares, whilst the left hands are cut from any spare left hands I could find with closed fists. I assumed that I would get away without too great a job with the left hands since they would be hidden behind a shield.

I pinned all the hands and arms; not because they need to be, but rather because it is just so easy to that I figured "why not". Hopefully they will paint up OK.

Thursday, 3 May 2012

Basing Empire war-machines


When I attended my first serious tournament, Polish sausage, it became clear that the convention was to base war-machines. So I have grabbed the opportunity to  have a go at building some bases.
 

The base shown above is one I have put together for a Helblaster volley gun. I have included the chap carrying the shot tray and a couple of barrels and boxes for extra shot. The war-machine crew only purpose is to indicate the number of remaining crew. Therefore it seams appropriate to include one crew member on the base, since once he is gone the machine is dead anyway..

I have also put together two bases for cannons. Each base was made by combining two cavalry bases. I believe that this gives enough room to show off the bases whilst retaining a nice compact look.

Saturday, 14 April 2012

Demigryphs: STILL on the painting table, mounts complete

Today marks a week since the Demigryphs were released and my attempt at painting them has stalled a little. I have (at last) completed the mounts, and I'm loving the cheeky look on their faces...

I have elected to keep with my Nordland colour scheme, so have painted the barding in a blue and cream combination. I am liking how they look, but they do remindme a little of some pottery my mother used to display in her display cabinet years ago.


 Having painted the barding,the animals fur and feathers looked a little dark so I had to lighten the colour with more Kommando Kharki and Bleached bone.

I am quite pleased with the finished look, but next time I will fix the feet to the base at the same time as I glue to the legs. The reason for this is that the alignment of some of the feet means that other legs don't quite touch the ground.

I hope you enjoy, now to return to the riders....

Sunday, 8 April 2012

Demigryph; off the workbench and onto the painting table

Yesterday I had managed to assemble the Demigryph miniatures and had flocked the bases.

The weather was kind and I was able to undercoat the figures and place some basic colours down. The Demigryphs still need a lighter highlight and everything else needs painting properly but at least I have made a start.
I am maintaining the Nordland theme with these guys so the barding will be painted a combination of blue and cream. The Gryphs have been built from Charadon Granite to Graveyard Earth to Bleached bone and then washed with various brown - red washes.

 I was able to make more progress with the bases, which are effectively finished.
Which is more than be said for the knights, who have had almost no work...

More progress shots as progress is made.....

Saturday, 7 April 2012

Demigryph on the workbench

 Today marks the release of a new Empire Army book together  with some fancy new figures. After trawling through the last edition of white dwarf I could not resist treating myself to a box of Demigryph knights. These are a kind of Hypogryph, just without wings. Very sweat.

I added small magnets into the saddle to give me the option of changing riders over should I find it better to have all troops or more command or just to change weapons. Apart from this they are straight out the box.
  
The model assembled easily with no real issues. It needed very little in the way of greenstuff apart from the normal areas over the seam. The only area of concern I had with the model were the feet. The feet are cast as separate elements, presumably to ensure they can maintain details parallel with the mold edge. I elected not to attach to the base at this stage because I wanted to keep painting easy,  but I found it tricky to make sure the feet were glued on at the right angle. Maybe if I had glued them all on at the same time that would have made life easier. As a result I have needed to add a little greenstuff in these areas.
The problem with painting the bases separately is that you need care with flocking the bases, so I marked out where the feet go on each base.. 

...I then added some cork and stone to break up the flat areas..


..and add some flock.
Then all I need is some riders. The only problem I experienced with these was lining up the legs correctly and adding the standard to the flag pole. This had a small area for gluing, so I decided to pin. This was not too successful and in my rush I appear to have added a slight kink. I will try and straighten out.


Hopefully it will stay dry enough for me to undercoat.
 More soon.

LinkWithin

Related Posts with Thumbnails